
Certain food preparation tasks often have a reputation for being challenging, and pitting cherries is no exception. As summer approaches, this task becomes more relevant, and it comes with the added stress of potential splatters that can leave stains. Those who have attempted to pit cherries can attest to this.
Before delving into the guide on how to pit cherries, it’s important to mention that wearing an apron is highly recommended regardless of the technique you choose. Thankfully, you don’t need any special equipment to pit cherries. In this guide, we will cover everything from selecting the right cherries and proper storage methods to washing them for optimal freshness. And, of course, we will explore various techniques for pitting cherries effectively.
How to Select Cherries
Cherry season conveniently falls during the warmer months of late spring and summer, typically from May to August. During this time, you’ll find a variety of cherries, mostly red, but some may display hues ranging from burgundy to yellow-red ombre or dark pink.
Cherries can be broadly categorized into two main types:
- Sour cherries: As the name suggests, these cherries have a tart flavor. Common varieties include English Morello, Early Richmond, and Montmorency. Tart cherry juice, which offers genuine health benefits, is also widely available.
- Sweet cherries: These cherries are richer in sweetness and are commonly found in most supermarkets. Popular sweet cherry varieties include Bing, Chelan, Lapin, Rainier, and Tulare.
Whether you opt for sour or sweet cherries, it’s important to choose the best ones. According to Sarah Brekke, M.S., a culinary specialist from Better Homes & Gardens Test Kitchen, look for firm cherries that yield slightly when gently squeezed. Avoid cherries that are bruised, wrinkled, too soft, or split. If the cherries still have stems, opt for ones with bright green stems.
Experts at the fruit company Stemilt emphasize that quality cherries should exhibit plumpness, firmness, and glossiness. Additionally, choose cherries that appear appropriately dark for their respective variety, as this is an indicator of ripeness and flavor.
How to Store Cherries
For cherry enthusiasts, it might be tempting to wash the cherries immediately after getting them home. However, similar to grapes and strawberries, it’s better to hold off on washing until just before you’re ready to pit and enjoy them. Washing cherries before storage can actually lead to quicker spoilage.
It’s also advisable to refrain from pitting the cherries too soon. Pitted cherries have a shorter shelf life due to exposure to moisture, according to advice from Sarah Brekke. Before storing the cherries, carefully inspect them and remove any that are soft, split, or moldy.
For optimal storage, keep the cherries dry, ideally unwashed and unpitted, in a bag or container that allows for some air circulation. The best place for storage is the crisper drawer in your refrigerator or any location away from strong-smelling foods.
To provide an added layer of protection, you can transfer the cherries to a wide container lined with paper towels, allowing the cherries to rest in a single layer.
When stored dry, unpitted, and refrigerated, cherries should last about 5 to 7 days, according to experts from Stemilt. However, for the best flavor experience, it’s recommended to enjoy the cherries promptly or consider freezing them if not consumed within a few days.
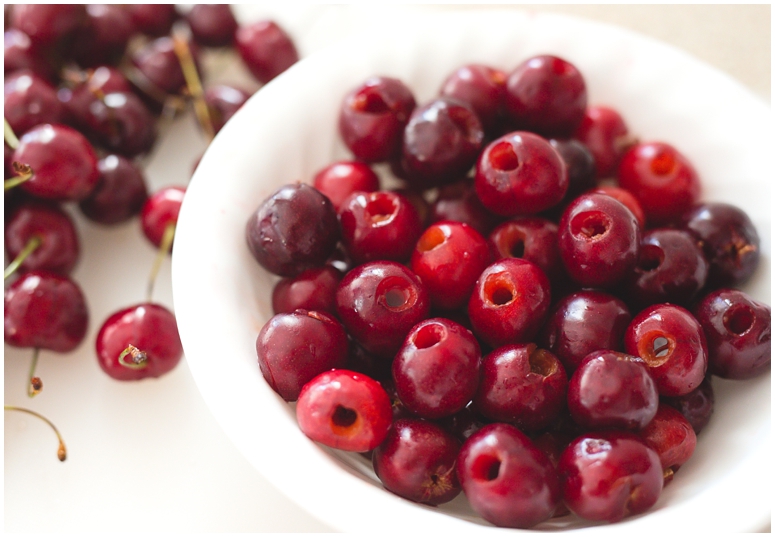
The Best Way to Pit Cherries
The most efficient and recommended method for pitting cherries is to use a cherry pitter. The BHG Test Kitchen staff, who frequently test cherry recipes, highly recommends the OXO handheld cherry pitter for this task. It allows you to pit up to six cherries at once, significantly reducing the time between you and your favorite cherry recipe. If you’re looking for a slightly more budget-friendly option with a quick release feature, the OXO Good Grips Quick Release Multi Cherry Pitter is a great runner-up choice, although it may require a bit more effort to clean and is slightly more expensive.
Using a cherry pitter is straightforward: place the cherries in the designated slot(s) of the tool and then squeeze or press to push the pits out, leaving you with pitted cherries ready to be used in your recipes.
For those who prefer kitchen gadgets with multiple uses, it’s worth noting that the cherry pitter can also be used to remove pits from olives, making it a versatile tool for your kitchen.